Please Note: We’re currently out of stock of LVT, while we switch supplier, we’ve reduced the cost of SPC flooring to the price of our LVT.
Get In Touch:
03303 332360
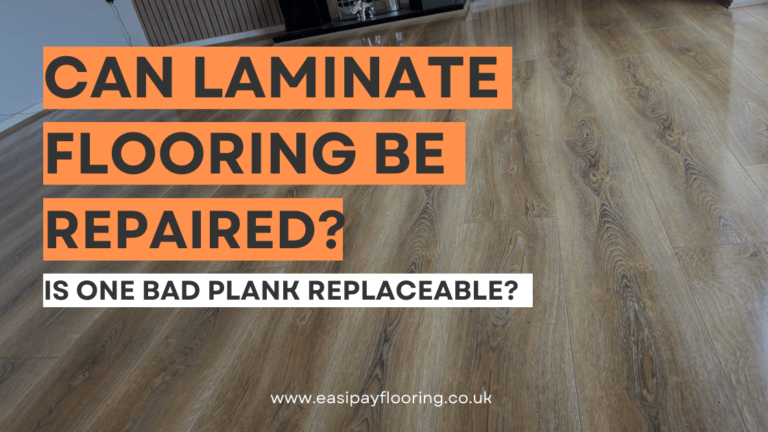
Laminate flooring is a popular choice for many homeowners due to its durability and affordability. However, like any flooring material, laminate can experience wear and tear over time. From minor scratches to more significant damage, knowing how to repair laminate flooring can save you time and money.
In this comprehensive guide, we’ll explore common issues that arise with laminate flooring and provide step-by-step instructions for DIY repairs.
Before diving into repairs, it’s essential to identify the specific issues affecting your laminate flooring. Common problems include scratches, chips, gaps between planks, water damage, and completely damaged planks. By understanding the nature of the damage, you can choose the appropriate repair method.
Minor scratches on laminate flooring can often be disguised or minimized using simple techniques. One method is to use a laminate floor repair kit, which typically includes a colour-matched filler and applicator. Apply the filler to the scratch, wipe away excess, and allow it to dry according to the manufacturer’s instructions. Once dry, gently buff the area with a soft cloth to blend the repair with the surrounding flooring.
You might even be able to hide a scratch in the clear layer with a nut! Rub a walnut across the scratch and watch the scratch be erased!
For larger chips or dents in laminate flooring, a more substantial repair may be necessary. Begin by cleaning the damaged area and removing any debris. Use a laminate floor repair compound or putty to fill the damaged area, ensuring it is level with the surrounding flooring.
Once the filler has dried, sand the repaired area lightly to smooth any rough edges. Finish by applying a colour-matched laminate floor repair marker or touch-up paint to blend the repair with the surrounding floor.
Over time, laminate flooring may develop gaps between planks due to fluctuations in humidity or improper installation. To close these gaps, first, determine the cause. If the gaps are due to seasonal changes in humidity, they may close on their own as moisture levels stabilize.
However, if the gaps persist, consider using a laminate floor gap filler or installing transition strips between rooms to conceal the gaps.
Water damage is a common issue with laminate flooring, especially in areas prone to spills or moisture. If water has seeped into the laminate planks, causing warping or swelling, prompt action is essential to prevent further damage.
Begin by drying the affected area thoroughly using towels or a wet/dry vacuum. If the damage is extensive, you may need to remove and replace the damaged planks. Alternatively, you can use a laminate floor repair kit specifically designed for water damage, which typically includes sealant and adhesive to reattach warped planks.
When laminate planks are completely damaged, such as severe warping or large sections missing, replacement may be necessary. However, replacing individual planks can be challenging for novice DIYers, as it requires precise cutting and fitting to ensure a seamless repair.
Additionally, laminate flooring is often installed as a floating floor, meaning individual planks interlock with adjacent planks, making it difficult to remove single planks without disturbing the surrounding flooring.
To replace a damaged plank, start by identifying the nearest wall to one of the sides of the plank. Because the planks are interlocked like a jigsaw puzzle, you’re going need to remove every plank between the damaged plank and the closest wall. Once you know which wall to start with, you’ll have to pull up the beading that keeps the laminate in place and hides the gap against the wall – beading is usually nailed or pinned in place, just use a hammer to pry this up!
Once you have the beading up you can start sliding planks out towards the wall and then pick them up. They may be tightly fit together, and you may need something soft but solid and a mallet to knock the planks out. For a DIY approach, if you have something like a chisel at hand you can use that but we recommend using a dish cloth or tea towel over the chisel’s edge to avoid damaging more planks. Gently knock the top, middle and bottom of the plank out bit my bit. Keep in mind that laminate flooring locks into place all around each edge, with either a tongue or groove so it must be slid out of place – you can’t simply lift it from any of the sides and pull.
Once you’re at the problem plank, we recommend using the planks you’ve just taken up to replace it, and using a brand new plank last, against the wall where a difference in wear/appearance can be hidden by furniture. You may need to knock the planks back in when relaying the flooring.
If the problem plank is in the middle of the room, it might not be necessary to go right up to the wall and remove everything. You will have to remove several planks either side of the damaged plank however. Go to the walls on either side of the broken plank and with your tools and mallet, knock each plank towards the wall as much as possible and work plank by plank inwards.
Hopefully, this should force enough planks away from damaged piece so that there’s a big enough gap to simply lift the problem plank out and replace it by laying another plank down and gently knocking surrounding planks back towards it, to lock it into place.
While laminate flooring is durable, it is not immune to damage. Fortunately, many common issues can be repaired using simple DIY methods. By understanding how to identify and address these issues, you can keep your laminate flooring looking its best for years to come. Remember to follow manufacturer guidelines and safety precautions when performing repairs, and don’t hesitate to seek professional assistance for complex or extensive damage.
If you’re after a new look that doesn’t break the bank and aren’t feeling like a DIY Hero, how about trying Easipay Flooring? We offer brand new flooring with the ability to spread the cost over time, paying weekly or monthly instead. There’s no interest, but there is free underlay! Sound good? Tap the button below to get set up a home visit to see our samples and get your free quote!
Yes, many common issues such as scratches, chips, and minor damage can be repaired without replacing entire planks. There are various DIY repair kits and methods available for addressing specific types of damage.
While repairing laminate flooring over radiant heating systems is possible, it’s essential to follow manufacturer guidelines and avoid using repair materials or methods that could damage the heating system. Consult with a professional if you’re unsure.
To prevent future damage, consider using protective furniture pads, area rugs, and mats in high-traffic areas. Avoid dragging heavy objects across the floor, and promptly clean up spills to prevent water damage.
Yes, squeaky laminate flooring can often be fixed using DIY methods such as inserting shims or applying lubricant to the interlocking joints. However, if the squeaking persists, it may indicate a more significant underlying issue that requires professional attention.
Repairing laminate flooring under fixtures like kitchen cabinets can be challenging but not impossible. In some cases, you may need to partially remove or lift the fixtures to access and repair the damaged area. Consult with a professional if you’re unsure how to proceed.
If laminate flooring has mould or mildew growth, it’s essential to address the underlying moisture issue before attempting repairs. Once the moisture problem is resolved, thoroughly clean and disinfect the affected area before proceeding with repairs.
Repairing laminate flooring in below-grade areas like basements may require additional precautions due to potential moisture issues. Ensure proper moisture barriers and ventilation are in place before attempting repairs.
If the locking mechanism of laminate flooring is damaged during repairs, consult with a professional for guidance on how to address the issue. In some cases, it may be necessary to replace the affected planks or seek professional repair services.
Unfortunately, fading or discoloration of laminate flooring may be challenging to repair with DIY methods. In some cases, refinishing or replacing the affected planks may be necessary to restore the flooring’s appearance.
Repairing laminate flooring in high-humidity or moisture-prone areas may require extra precautions to prevent further damage. Ensure proper ventilation and consider using waterproof repair materials when addressing issues in these environments.